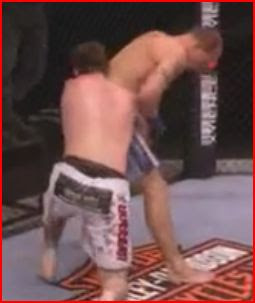
Check out this sequence from his fight, a very slick transition from a takedown attempt to back control performed by Bibiano. Pay close attention to where Bibiano's head is in every photo.
 1) Bibiano is in on a single leg takedown. Not the deepest shot but he has a good grasp of Otsuka's leg. Bibiano's head is on the outside and typically the idea from here is to step back and away while driving his left shoulder and head down to finish the takedown.
2) Here you can see Bibiano do just that...Steps back and away and begins driving his shoulder and head down while pulling in on the leg to get it lifted in the air. There are different variations on the grip that Bibiano has on his leg, what he has here isn't what I would call ideal but you can't always get everything perfect in a fight.
 3) Bibiano now has the leg lifted and in between his legs. Often times you'll see guys squeeze their knees together from here to prevent the opponent from using his shin across the body to defend. Bibiano has so many options here. He can revert back to the single leg attempt, he can also switch from the single to the double and run Otsuka off to the left side of the screen.
4) Otsuka's energy is leaning forward and Bibiano's head is on the outside. This is a bad combination for Otsuka because his back is already exposed. Take note that Otsuka's leg in still in between Bibiano's legs.

5) Bibianos hustles to the back and Otsuka is low on options. Keep in mind that this whole sequence happens very quickly. Bibiano is almost guaranteed at least one hook in, remember the leg was in between his legs to begin with.
 6) Otsuka knows what is coming so he tries hard to turn into Bibiano, hoping to salvage at least a half guard, or possibly to scramble and end up on top of Bibiano if he is able to get some separation between his back and Bibano's chest. The over and under control that Bibiano has in EXTREMELY important at this point.
7) Bibiano's back sticks to Otsuka and he stays behind, following Otsuka as he tries to turn out. It's pretty much now a done deal that Bibiano will take the back.
 8)Bibiano doing what a world champion in Jiu-Jitsu can do. You absolutely cannot get lazy in this position. Just a little bit of separation between the chest and back can turn the game around right away. The over/under control shown in picture #6 is key. If Bibiano gives space and isn't good with that grip, he can end up on bottom and fighting from guard. Bibiano also has an option of posting his left arm on the mat to post himself up if needed.
9) Bibiano adjusts further to stay behind Otsuka. Moments later he is able to place his right hook to get the back fully.
Once again, the whole sequence takes place very quickly when seen in real time. Make sure you pay attention to where your head is when you are working on a single leg. One factor in this position if how well your opponent is able to keep balance on one leg. If you look at picture #2, Otsuka could have worked on the "switch" defense if he was able to keep his balance long enough to try.
Good training to you all, I hope you enjoyed this post and may it be helpful to all of you. You will be surprised at how often the back if offered from any clinching position like this. Stay healthy!


